Showing posts with label homemade. Show all posts

Wednesday, December 18, 2013

Busy Busy Bee


I've gone full-throttle into baking for the holidays and the madness has just begun.

Eggnog is usually a Christmas staple, if you're into that thing. I however, am not a huge fan of it. I like to think I like it, but I can't drink an entire glass, it's too rich. After seeing a recipe for "Melt in Your Mouth Eggnog Cookies" I had to try it. Just a touch of eggnog couldn't hurt, right? 

The recipe calls for rum extract and the first time I made them I didn't have rum extract and didn't feel like trekking out in the snow to get it, so I uses almond. The almond extract worked pretty well, I was pleasantly surprised. Second time around however, I made it with rum extract and it was so much better! Eggnog has a similar flavor to the rum extract which brought it out even more without having to use too much, especially in the frosting. Putting too much liquid will otch your icing so the extract gave the eggnog a little help in standing out. 

It's perfect for the holidays whether you love eggnog or like to think you love it. 


After making these I had some eggnog left and wanted to incorporate into something else. I started making peanut butter cookies, adding some peanut butter chips to the batter and thought maybe some eggnog frosting/glaze would go well. I was nervous about the two flavors mixing but they worked out pretty well. 


The peanut butter and the eggnog complimented each other well. The eggnog balanced out all of the peanut butter and visa versa and they turned out even better than I thought!

Tuesday, November 26, 2013

Special Treat for a Special Kiddo

So long story short, a friend of mine's daughter was pretty sick for awhile and I wanted to make her something for when she felt better. I've kinda go a knack for this baking thing so I asked what her favorite candy or flavor was and if she was a cupcake or a cookie gal. After given dark chocolate and cookies as clues, I whipped up a quick and easy but delicious treat.

I didn't want to bake a chocolate chunk cookie. While delicious, they can be boring and predictable especially since I've kind of created a reputation for myself. And, I found out anyway that she ended up making chocolate chip cookies herself the day before. So I went with one of my favorites, oatmeal. I must admit, I'm not a fan of dark chocolate. Gasp! I know I know. It is a preferred taste but the oatmeal muffled it a little to where I actually enjoyed it.

The whole process was really simple. I got a giant bar of dark chocolate and put it into the Ninja, just long enough to chop it up but not too much. I wanted chunks, not fine shreds.


I learned pretty quick that dark chocolate melts really fast while you're dealing with it so you don't want to keep it in the chopper too long anyway. Mixing it into the batter may have been an issue too so I just crumbled the chunks of chocolate on top of each cookie before putting them in the oven. 


I was kind of worried about that decision at first because it looked like a pool of chocolate on top but it worked out nicely and turned out pretty tasty. So don't be afraid of dark chocolate if you're not a fan, there are ways to make it work. Plus, it's supposed to be good for you!


Tuesday, November 12, 2013

The Way To a Man's Heart is Through ... Brownies.

Now I'm no relationship expert but I have learned that the way to a man's heart is through his stomach. Seriously, try it some time. I also mentioned before that my boyfriend has been asking for normal brownies. He pretty much gets everything I bake and I do a lot of baking for him so I complied because I do tend to go a little crazy sometimes. But I couldn't help but get a little gutsy with another batch.


 Can't really go wrong with a chocolate chunk brownie, which is what he constantly tells me. And he's' right and they turned out great as usual. I had some extra supplies though and a little something else I wanted to add. Can you tell what it is?


You know it's already a good day when I get to use the Ninja. Despite it sounding like I'm grinding up silverware it was great for chopping up some Reese's Pieces. I didn't want them to be too fine and just add them to the batter so I sprinkled the partially chopped chunks on top.

They turned out fabulous too. Peanut butter and chocolate just work. Super simple too and it'll work with any candy you'd like really. I thought about M&M's but it would be a little too much chocolate for me. (Gasp!) I know I know.


Not too shabby, eh? 

Tuesday, November 5, 2013

No Such Thing as Too Much…. Peanut Butter

So I'm not a huge fan of just regular old peanut butter cookies. I'll eat them but I'd rather make something a little more. I am a big fan of Reese's Pieces and I bought them with intensions of using them in Puppy Chow but changed my mind. I had a craving for cookies and I know my boyfriend loves peanut butter cookies. I like candy in cookies so I made peanut butter Reese's Pieces cookies. Genius. I impressed myself on this one.


I had a few worries. One being that it may be too much peanut butter. The candy coating evened it out nicely and the consistent and even taste of peanut butter in Reese's Pieces is different than that in a cookie. It was rather harmonious, if you will.

Another worry was that I got a little happy with the Reese Pieces. I put the entire bag in one batch and at one point it looked like more candy than cookie. Again, I was wrong. You really can't put too much in I guess. The more the merrier.


I must say I was pleasantly surprised and amaze myself sometimes. These will be made again.


Pretty in Pink

Last Friday I had the pleasure of babysitting my three-year-old niece for a few hours and I thought, what better way to have fun than teach her my favorite hobby: baking!

This little cutie patootie is kind of partial to the color pink. Kind of as in that's all she talks about so of course we had to translate it into a cupcake. Now I'm new to the whole "pinkalicious" movement but she loves it. So I went with it and we created the Pinkalicious cupcake.

Nothing too fancy, just some food dye, sprinkles and yellow cake. But hey, pink cupcakes are a big deal.


I've decided to always make my own frosting from now on. I never really noticed how much of a difference there is before but it's definitely there. It makes my teeth hurt thinking about the stuff in a tub so I taught Erin how to make it and well, she got a little heavy on the mixer. 


After letting the cupcakes cool we were ready to frost and no pinkalicious cupcake is complete with out some pinkalicious sprinkles. I've never seen someone so excited over pink cupcakes and sprinkles but that made it all worth it. 


And there you have it, super simple cupcakes that taste great and a super fun project for you and your favorite little one. 

Wednesday, October 9, 2013

Good morning, pumpkin!


Fall is my favorite time of year. The cool weather, the colors of the leaves changing and of course, pumpkin. Pumpkin is huge now. Everything comes in pumpkin and pumpkin scones from Starbucks were always my favorite. I've never ventured into the scone world but I had been on a baking hiatus and was itching to try something new. It surprisingly wasn't as difficult as I thought. The only difficult part is some of the ingredients you may not have on hand. Which isn't necessarily difficult but annoying. I got over it though. 

Most scone recipes call for molasses which you can easily find next to the pancake syrup at the grocery store. You'll also need pumpkin spice. I actually found a bottle of pumpkin spice in the baking section of the store and it smells wonderful. If you can't find it, an easy mix of cloves, cinnamon, nutmeg and ginger will do the trick. You'll still need pumpkin of course, which if you're like me you've stocked up while it's in season. Make sure it's canned pumpkin and not pumpkin pie. You'll also need your basic flour, brown sugar and butter. Make sure your butter is cold! 


Not working with softened butter kind of freaked me out but just chop it up into small pieces and mix it into your flour and sugar mix, you want it to be crumbly but still completely mixed together. Mix in your pumpkin and other liquids separately and you'll form a dough. You'll want to knead it on a floured surface like you would any other bread and then you can take a pizza cutter to cut it into the normal triangle shape or however you'd like. Can't lie, I had some issues making triangles so I just scooped them up like cookies. 

While they're baking you can make the glaze which is super easy. All you need for the initial glaze is to whisk powdered sugar and milk together until it's thick. For the pumpkin, you'll still use powdered sugar but you'll add your canned pumpkin (not pumpkin pie mix), pumpkin spice and milk to drizzle on top. I found it easier to make the white glaze in a wide enough dish so you can just dunk the scones in upside down when they're cool. Then take a spoon and drizzle the top with the pumpkin glaze. (Apologies for the lack of photos, I lost most of them when my phone had a heart attack)


They don't look like Starbucks scones but they definitely taste good! Enjoy for breakfast, after dinner or whenever you feel like a pumpkin treat. 


Monday, September 16, 2013

Super Cupcakes for a Super Birthday

I was asked a very big favor a month ago and was very excited. I was asked to make cupcakes for a five-year-old's birthday and not just any kind of cupcakes (why be boring?), super hero cupcakes.


I found out he likes chocolate so I obviously had to make a chocolate cake but I didn't stop there. I added cream cheese and Nutella in the center. It definitely broke up the chocolate without losing too much of the chocolate flavor. Different textures usually help. 


My original intention was to put a hot chocolate mousse in the middle, but that didn't go so well.

Now onto the decorating. I made a normal buttercream frosting and divvied it up to make different colors per super hero. Spiderman obviously got red, Superman was red, blue and yellow (I bought the appropriate cupcake paper too) and Batman was blue. I found some toothpicks with the characters and decided to add M&M's on top, for another different texture. 


Needless it say it was a success and I'm really excited for more themed cupcakes. Shoot me an email if you're looking for something sweet for your next event! In the meantime, I can't wait for October...


Follow It's Hip to Be Square on Twitter!

Like us on Facebook!


Sunday, August 25, 2013

Baking Fail: How NOT to Make Mousse

I've made a lot of mistakes on this baking adventure but not so much where I sacrificed 50 cupcakes...

I was so excited to make chocolate cupcakes with chocolate chip mousse filling for a birthday party and thought I had it in the bag. I had my heavy cream, some powdered sugar and I used mostly hot chocolate packets to sweeten and give it a hint of milk chocolate flavor. Who doesn't love hot chocolate?

It came out beautiful. I had a huge geek moment. After all, not many people get excited over the fluffiness of homemade mousse. I was proud!


The picture doesn't really do it justice, but you get the point. 

I couldn't just leave it at that. Nope, I had to be gutsy which in turn became my downfall. I chopped up milk chocolate and white chocolate chips that I wanted to add to it. Well, they're kind of heavy and I got a little overboard and while it still tasted delicious, it flattened the mousse. And my spirit. 


It became a soupy mess and I was more upset than I should of been but hey, now I know. Ease up on the chips and fold them in instead of tossing them into the mixer. 

I tried baking them in the center anyway and it was a complete disaster and I had to start all over. I couldn't bare to serve them like that. 

So now we know and I thought I'd spread the word on how NOT to go about experimenting with mousse and you're welcome. :) Although I still highly recommend using hot chocolate packets. 


Follow It's Hip to Be Square on Twitter!

Like us on Facebook!


Monday, August 12, 2013

Tea and Crumpets? Kinda...

Crumpets are a griddle cake that pretty much look like an English Muffin and are mainly eaten in the United Kingdom with tea. Well around these parts, I bake cookies with my tea.

Let's start with the tea. Chai tea has always been my favorite, especially the chai tea lattes at Starbucks. Chai is a black spiced tea from india and the word Chai simply means 'tea' in Hindu. There are strong notes of cinnamon and cloves that stand out but also cardamom and ginger.

I wanted to play off the cloves and cinnamon aspect of the chai. I've made chai frosting before with pumpkin bars but that's a whole new ballgame that we'll get to come fall. I've ironically not been much of a fan of cinnamon but I do enjoy cinnamon sugar so I wanted to incorporate that into the cookie but not too much to where it would take away from the spiced chai flavor.

So I turned to the snickerdoodle. I haven't experimented with the snickerdoodle much but I'm glad I did. The dough is stickier and more doughy than normal cookie dough which gives it a little flakiness. I rolled the dough into balls, rolled it into some cinnamon sugar and baked about 10-12 minutes at 350.

While they were baking I made a chai glaze. It's easier than it sounds. All I used was powdered sugar, water, ground cinnamon and ground cloves. I combined everything with a whisk until I reached a taste and consistency that I wanted and dunked the cookies in. The advantage to the square shape is that it sinks a little in the middle and holds onto more of the glaze that hardens in the fridge after awhile.


I dont mean to toot my own horn but I continue to impress myself and definitely see myself making these in the future. Tea party or not.


Follow It's Hip to Be Square on Twitter!

Like us on Facebook!


Sunday, July 7, 2013

Break me off a piece of that ...

I think that Kik-Kats are kind of underrated. They're not usually the first thing people think of when you say candy bar but I realized it's the perfect mix of chocolate and crunch and good consistency for a frosting. I've also had requests for red velvet cake and instead of the normal cheesecake frosting I mixed it up with some crumbled kit-kats. Simple, but delicious.


I've done red velvet before - for Valentine's Day, how cliche! - and I wanted to mix it up. I did before by adding chopped up white chocolate and chocolate chips to the frosting and white chocolate chips in the batter but anyone can make a red velvet cupcake with cream cheese frosting. My creativity escaped and I've been thinking about what I can make with Kit-Kats and this was perfect. I LOOOVVEE Red Velvet and balancing it out with a buttery frosting with the milk chocolate from the Kit-Kats balanced it out pretty well. 


I've got quite the knack for turning candy into cupcakes. Any more ideas??


Thursday, June 13, 2013

I haven't had anything yet, so how could I have some more?

This cupcake pays hommage to a baseball classic. 


S'mores are the best part of a bonfire but when you don't have the resources for a bonfire, what better way to recreate the tasty treat as a cupcake that you can bring anywhere? And how about an upgrade? Instead of Hershey chocolate bars, try Nutella. 


Just use your favorite cake recipe and in the center of each cupcake put a couple mini marshmallows and a spoonful of Nutella before baking.


As for the graham crackers? Crumble up a bunch and toss them into the frosting as it's mixing and it provides the perfect sweet cinnamon crunch. Sprinkle a little cinnamon on top and voila! Portable, anywhere s'mores. 


Sunday, June 9, 2013

Two Pretzels were walking down the street, one was assaulted

I thought I hit a jackpot with these babies but making the impossible possible, I struck even more gold with caramel pretzel cupcakes. Not only that, I got to use my favorite gadget in the world to make the frosting.

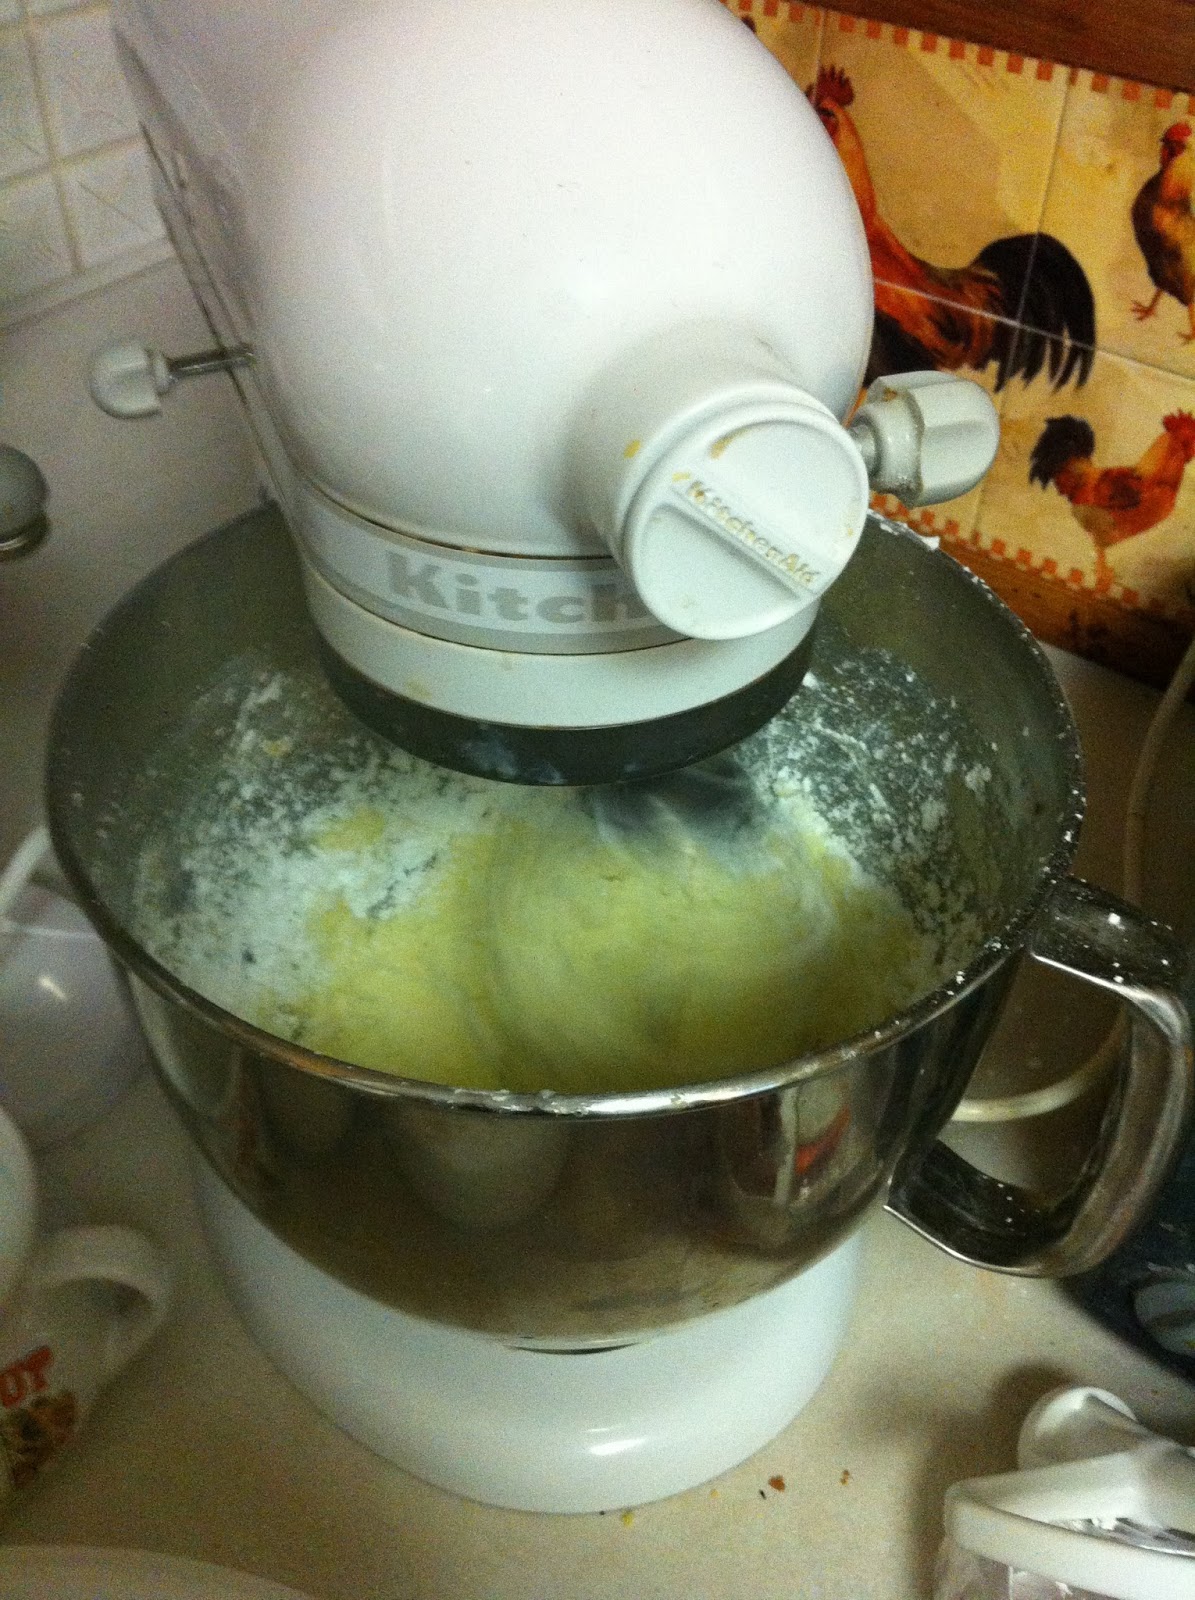
I give you, the Kitchen Aid Mixer.


Yes, I've fallen in love with an appliance. If you bake, you understand. Not only that, the frosting could not have been easier to make. All it is is butter, powdered sugar and chopped up pretzels. The pretzel frosting pretty much makes the cupcake. Not only that, but I put a Werther's caramel chew in the middle of each one. 


I didn't get the gooey-consistency center like I expected but it turned out even better. It created a caramel coating on the bottom of the cupcake that had just enough candy crunch but not enough to where you feel like your teeth are going to fall out. 

And for the grand finale...


They went over pretty well, to say the least and I will be making them again. Perfect combo of sweet and salty and I'm kind of proud of myself for whipping this up on just a hunch and a trip to Aldi.